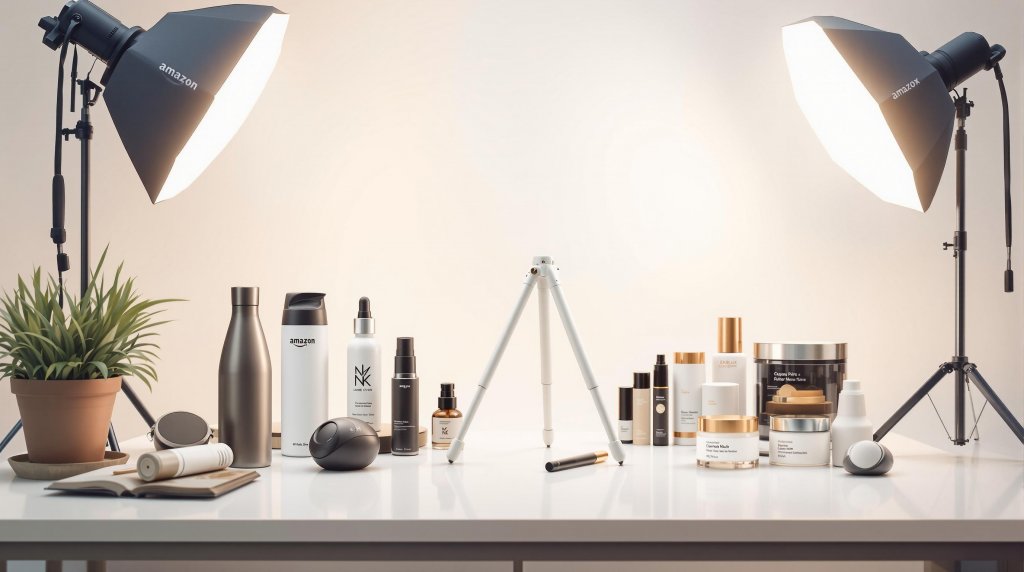
Product photos are crucial for success on Amazon. They help build trust, improve visibility, and boost sales. This guide offers 8 actionable tips to create high-quality images that meet Amazon’s standards and attract buyers:
- Meet Amazon’s Image Rules: Use a pure white background, ensure a minimum size of 1,600 pixels, and cover at least 85% of the frame. Non-compliance can hurt rankings or suppress listings.
- Master Lighting: Use LED lights, softboxes, or natural light to eliminate shadows and enhance clarity.
- Choose the Right Camera: A DSLR, smartphone, or point-and-shoot camera works. Pair it with a tripod for sharp images.
- Use Multiple Angles: Showcase your product from all sides – front, back, top, and close-ups.
- Add Lifestyle Photos: Show your product in real-life settings to make it relatable.
- Create Infographics: Highlight key features, dimensions, and benefits directly on the image.
- Edit Like a Pro: Use tools like Photoshop or GIMP for color correction, background cleanup, and optimization.
- Test Your Images: Use tools like PickFu or Amazon’s split-testing feature to find the best-performing photos.
Quick Tip: Include at least 6 images and 1 video per product to maximize customer engagement. Follow these steps to create photos that not only comply with Amazon’s guidelines but also drive conversions.
How To Take The BEST Amazon Product Photography 📸
Amazon Image Requirements
Here’s what you need to know about Amazon’s image guidelines and their impact.
Image Technical Specs
Amazon has specific technical rules to ensure product images look great and function correctly:
| Image Requirement | Specification | Details |
|---|---|---|
| Minimum size | 1,600 pixels (longest side) | Activates the zoom feature |
| Maximum size | 10 MB | Cannot exceed 10,000 pixels |
| Color space | RGB or CMYK | RGB is preferred |
| Aspect ratio | Up to 5:1 | Maximum allowed width-to-height ratio |
| Background | RGB (255, 255, 255) | Must be pure white |
| Frame coverage | At least 85% | Product should dominate the frame |
Following these specs is crucial. If your images don’t meet these requirements, your listing may suffer.
Non-Compliance Effects
Using images that don’t meet Amazon’s rules can hurt your product’s performance in several ways:
- Listing suppression: Non-compliant images could lead to your product being removed from search results.
- Lower visibility: Poor-quality images can negatively impact your search ranking.
- Missed sales: Without the zoom feature (enabled by images over 1,000 pixels), you lose a key tool that helps boost sales.
"Images are an important part of selling products on Amazon. They make it easier for customers to evaluate and learn about your product." – Amazon
To stay competitive and compliant, Amazon suggests adding at least six images and one video for each product. This approach not only meets platform standards but also gives customers the visuals they need to make confident buying decisions.
1. Lighting Basics
Good lighting is essential for creating professional Amazon photos that drive sales. Since 87.6% of shoppers say product images are a crucial part of their shopping experience, understanding the right tools and techniques can make a big difference. Here’s how to tackle common lighting challenges with the right equipment and methods.
Basic Lighting Equipment
Here are some lighting options to consider:
| Lighting Type | Best For | Price Range | Key Features |
|---|---|---|---|
| LED Continuous Lights | New users | $85–$220 | Easy to use, instant adjustments |
| Studio Strobes | Professional shots | $299–$570 | High power, dramatic effects |
| Natural Light | Budget-friendly | Free | Great for outdoor products |
Pair your lights with these modifiers for better results:
- Softboxes: Soften and spread light evenly to reduce harsh shadows.
- Reflectors: Brighten dark areas and balance the overall lighting.
- Light Box: Offers a controlled setup for consistent, high-quality photos.
Fix Common Light Problems
Here’s how to handle some typical lighting issues:
- Eliminating Harsh Shadows
Adjust the position of your main light source and place a diffuser between the light and the product. Use a reflector to brighten shadowed areas. - Managing Exposure Issues
Control exposure by tweaking the light’s intensity or moving it closer or farther from the product. A light meter can help you ensure consistent results. - Color Temperature Control
Keep colors accurate by using lights with consistent color temperatures. LED lights with adjustable settings are excellent for achieving a clean, white background.
2. Camera Equipment Guide
You don’t need to break the bank to take great Amazon product photos. With some basic tools and smart choices, you can create clear, professional-looking images that help boost sales.
Essential Photography Tools
Here’s what you’ll need to get started:
- Camera: A DSLR, point-and-shoot, or even a modern smartphone can do the job.
- Tripod: Keeps your shots steady and sharp. You can find decent options starting at around $25.
- Background Setup: A seamless white background works best for clean, distraction-free photos.
- Bounce Cards: Helps control shadows and improve lighting.
When picking a camera, focus on ease of use and consistent image quality. You don’t need all the bells and whistles – just a reliable device, whether it’s new or secondhand.
Budget-Friendly Options
If you’re working with a tight budget, there are plenty of ways to save without sacrificing quality:
- Camera Alternatives: Use your smartphone if it has a good camera, or look for entry-level DSLRs or high-end point-and-shoots. Used cameras can also be a great deal.
- DIY Studio Setup: Create a lightbox or light tent using household items. A white sheet or poster board works as a backdrop, and foam boards can act as bounce cards.
- Affordable Accessories: Get a basic tripod with a smartphone adapter, white foam boards for reflectors, and clamps to hold your background in place. A sturdy flat surface can double as your staging area.
With these tools and tips, you can produce high-quality product photos without spending a fortune.
3. Photo Composition Tips
Good composition can make your product photos more appealing and help boost sales on Amazon. Here’s how to create product images that stand out and drive conversions.
Rule of Thirds
The Rule of Thirds divides your photo into a 3×3 grid with two horizontal and two vertical lines. Most cameras and smartphones have this grid feature, making it easy to use.
Here are some tips for applying it:
- Align important product features with the grid’s intersections.
- In lifestyle shots, place the horizon along the top or bottom horizontal line.
- For images with movement or direction, leave extra space on the side the subject is facing or moving toward.
Simple Backgrounds
A clean background helps keep the focus on your product. Amazon requires white backgrounds, which also make your product pop.
- Choose the Right Material
- Use seamless paper rolls for large items.
- White foam boards work well for small to medium products.
- Photography lightboxes are ideal for compact items.
- A plain white canvas is another good option.
- Set Up Your Background
Create an infinity curve using your chosen material and secure it with clips. Add foam boards as reflectors to remove shadows, and make sure any supports stay out of the shot.
Stick to pure white backgrounds for the best light reflection and image quality. If you’re working with smaller products and a tight budget, a white poster board can work well as long as it’s properly lit and positioned.
sbb-itb-00a41f0
4. Multi-Angle Photography
Using multiple angles in your product photos can showcase its features in a way that mimics an in-store experience. This approach can increase buyer confidence on Amazon by giving shoppers a complete view of what they’re purchasing.
Full Product Coverage
Capture your product from six key angles to provide a thorough visual experience:
- Front View: The main shot that highlights the product’s most important features.
- 45-Degree Angle: Adds depth and shows multiple sides at once.
- Side Profile: Displays thickness and side-specific details.
- Back View: Focuses on rear features like ports or attachments.
- Top View: Offers a sense of scale and layout from above.
- Macro Shot: Zooms in on fine details for a close-up look.
Ensure all photos have consistent lighting, neutral backgrounds, and clear markers for rotation. These angles, combined with good lighting and composition, create a polished and inviting product listing.
Detail Shot Guide
Close-up shots are essential for emphasizing your product’s unique features:
- Feature Identification
Pinpoint the standout elements of your product. For instance, if you’re photographing a hiking backpack, focus on details like waterproof fabric, reinforced stitching, specialized straps, compartments, and chest belt design. - Macro Photography Setup
Follow these steps for sharp and detailed close-ups:- Switch to macro mode or use a macro lens.
- Angle your light source at 45 degrees for even illumination.
- Use a tripod to avoid blurring from camera movement.
- Keep a minimum 6-inch distance for accurate focus.
"Angles matter in product photography. They expose details, helping shoppers make informed decisions. Plus, shoppers who cannot see the particulars of a product will not likely buy it." – Carolyn Mara
For easy organization, label your images with variant codes like:
- PT01-PT99 for detailed feature shots.
- TOPP, BOTT, LEFT, RGHT, FRNT, BACK for specific angles.
5. Lifestyle Photo Setup
Lifestyle photography goes beyond just looking good – it helps customers see how a product fits into their everyday lives. These types of photos can make your product more relatable and boost conversions.
Setting Up Use Cases
Plan scenes that feel natural and relatable:
- Location Selection
Pick realistic settings and aim to shoot during golden hours for soft, flattering light. - Model Coordination
Use models to showcase genuine, everyday interactions with your product. - Scene Setup
Create setups that highlight how your product is used. For instance, show a kitchen mixer in action during a family baking session.
Once your scene is ready, focus on props to help tell your product’s story.
Prop Management
Props should add to the scene without stealing attention from the product.
Tips for Choosing Props:
- Color Coordination
Choose props in colors that complement your product and maintain a cohesive look. - Scale and Balance
Keep props proportional to the product so it remains the main focus. - Keep It Real
Use props that naturally fit with your product and its setting. Avoid overly staged or artificial arrangements.
Example:
If you’re photographing a popcorn bowl, include a movie poster in the background and scatter some popcorn around. This creates a cozy movie night vibe that customers can easily connect with.
6. Making Clear Infographics
Infographics are a great way to present your product’s main features and details in a quick and easy-to-digest format. For Amazon listings, they help customers understand your product at a glance, complementing the visual elements you’ve already incorporated. Well-designed infographics can directly influence buying decisions by making important details clear.
Infographic Components
To create effective infographics, include these key elements while keeping the design clean and easy to follow:
Core Product Information:
- Key features and specifications
- Product dimensions
- Usage instructions
- Benefits and perks
- Customer feedback or satisfaction stats
- Unique selling points
Visual Elements:
- High-quality product images
- Simple, easy-to-recognize icons
- Brand colors and logo for consistency
- Clear, sans-serif fonts
- Arrows or markers to guide viewers
- Plenty of white space for better readability
"’Infographics’ or ‘Information Photography’ or ‘Information provided via graphics’ is a Vital way of providing the necessary information about the product on the product photo itself." – EtherArts Photography
Layout Guidelines
To ensure your infographics look professional and encourage conversions, stick to these design principles:
Structure and Flow:
- Organize information hierarchically, aligning details with related product areas
- Use consistent spacing to avoid clutter
- Maintain strong contrast for easy reading
- Add directional cues to guide the viewer
Best Practices:
- Keep text short and free of errors
- Use brand colors that complement the visuals
- Design with mobile users in mind
- Avoid cramming too much information into one image
- Present a polished, professional look
- Save files in JPEG format to meet Amazon’s requirements
Content Organization Tips:
- Highlight the most important feature first
- Group similar details together
- Use flowcharts for step-by-step instructions
- Place key selling points at eye-level
- Include size or scale references when needed
7. Photo Editing Steps
Photo editing plays a key role in creating polished, conversion-driven Amazon listings. After setting up your photography, careful editing ensures your images are ready to impress.
Editing Software Options
Choose software that combines necessary tools with user-friendly features. Here are some popular options:
Professional Tools:
- Adobe Photoshop and Adobe Lightroom: Great for batch editing, advanced adjustments, and precise color fixes.
- PortraitPro: Perfect for detailed touch-ups, with various pricing levels.
Affordable Options:
- GIMP: A free tool packed with powerful features.
- Paint.NET: Easy to use for basic edits.
- PicMonkey: Online editor with budget-friendly plans.
- Clipping Magic: Specializes in background removal for eCommerce images.
Guidelines for Honest Editing
Your edits should always represent the product accurately. Stick to these essential steps:
1. Color Correction
- Adjust white balance to match the product’s actual colors.
- Fix any color issues caused by lighting.
- Avoid filters or over-saturating the image.
2. Background Adjustments
- Remove distractions from the background.
- Use a pure white background (RGB: 255, 255, 255).
- Add subtle shadows for depth and realism.
3. Image Optimization
- Save images in JPEG format to meet Amazon’s standards.
- Ensure each side is at least 1,000 pixels.
- Compress files to reduce size without losing quality.
Quality Control Tips:
- Compare the edited photo to the actual product to confirm accurate colors and textures.
- Fix small flaws but keep the product’s natural look intact.
- Use a consistent editing style across all images in the listing.
"’Infographics’ or ‘Information Photography’ or ‘Information provided via graphics’ is a Vital way of providing the necessary information about the product on the product photo itself." – EtherArts Photography
For more advanced edits, consider hiring professional retouching services.
8. Image Performance Testing
Once you’ve nailed lighting, composition, and editing, the next step is making sure your photos perform well. Testing and updating your images can help boost sales and keep your listings competitive.
Split Testing Photos
Testing your photos can lead to better sales by relying on data to make improvements. Here’s how you can do it:
- PickFu: This tool provides fast, targeted feedback, starting at $15 for 15 responses. You can get results in just a few hours, helping you test without risking sales. For example, a PickFu test for a hook rack compared images with and without packaging. The version with packaging was preferred because it better conveyed assembly status, size, and professionalism.
"PickFu is like a real-life fortune teller. Just set up a test and it will predict the future for you, saving you a ton of money and aggravation in the process." – Mike Jackness, Co-founder, EcomCrew
- Amazon’s Testing Tool: If you’re a brand-registered seller, Amazon offers a built-in tool for live split tests. It lets you track conversions and gain insights directly from shoppers.
After identifying the best-performing images, don’t stop there – keep them updated regularly.
Regular Photo Updates
Use your test results to make updates when a better version emerges, when product features change, or even seasonally to stay relevant.
Photo Optimization Checklist:
- Technical Quality
- Make sure images meet Amazon’s resolution and lighting standards.
- Maintain a consistent style across all photos.
- Content Review
- Include all product variations in your photos.
- Update lifestyle shots to match current trends.
- Revise infographics with the latest product details.
"I’ve never had a way to get immediate feedback from real potential buyers like I can with PickFu. It makes a huge difference to our product listings’ rankings and conversions." – Jeff O’Bryant, CEO & Co-Founder, Leap Stores
Conclusion
High-quality product photos play a major role in driving conversions on Amazon. Premium A+ Content can increase sales by up to 20%, and 3D models have been shown to potentially double the likelihood of a purchase.
To create successful Amazon product photography, focus on these key elements:
- Technical Quality: Ensure images meet Amazon’s requirements, load quickly, and are optimized for search.
- Visual Impact: Use professional lighting, clean backgrounds, and thoughtful composition to make products stand out.
- Customer-Centric Approach: Include lifestyle images and infographics that address buyer concerns and showcase product benefits.
- Ongoing Testing: Track how your photos perform and refine them based on data and customer feedback.
These strategies are essential for building and maintaining success on Amazon.
As Mickey Toogood, Sr. Content Marketing Manager at Amazon, says:
"Product photos bring products to life and influence purchase decisions."
Exclusiva Inc offers photography services – from white background and lifestyle images to 360° videography – that are designed to boost conversions using a proven 3-step optimization process.
When shoppers make decisions on Amazon, product reviews and images carry significant weight. Use these photography tips to improve your listings and achieve long-term results.


